Save Money and Time with a Christmas Shopping Spreadsheet!
- Lisa Barry
- Sep 25, 2022
- 3 min read

Updated: Oct 23, 2022
That sounds ludicrous doesn't it? But seriously, it has made my Christmas shopping efficient, meaningful, and cost effective! I've created a whole video on how to do this (click here), but let me just give you the gist of how it goes.
First, one of my daughters will usually create the initial spreadsheet on Google Drive.
Go to Google Drive and sign up if you need to.
Click on File>New>Spreadsheet
You'll see columns labeled left to right A..B..C..D
Put your cursor over the line between column A and B. When you get to just the right spot, it will light up in blue and show a horizontal line with arrows on each end. This means you're ready to change the width of the column. While it's still showing that arrow, left click and hold while dragging that line to the right to make it bigger. That first column will be for a title of what someone is asking for, for Christmas.
The second column can be smaller but you'll still need to follow the same steps from #4 to make that one a little bit larger.
The third column needs to be very big.
The fourth column should be an average size. (You can change these sizes later)
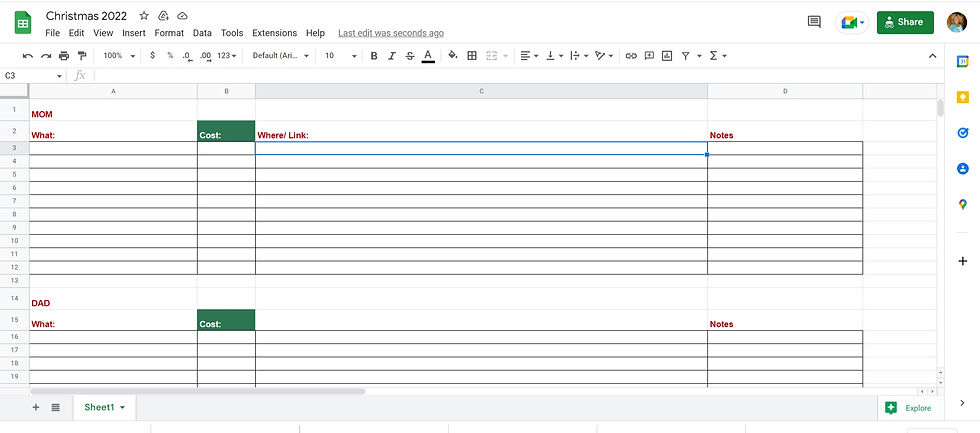
On the first row, type in the first name of the person on your gift list.
On the second row, first column, type in "What". That's for a simple title of what is wished for.
Stay on the second row, but tab over to the second column and type "Cost". That is self explanatory.
Stay on the second row, but tab over again to the third column and type "Where/Link". Either type in the store name or a hyper link that can take you directly to the item online.
You might also want to use the unlabeled 5th column for extra information about Black Friday prices/Cyber Monday or other information.
Next, and this is a little tricky if you're not used to Google Sheets, go to the third row, and put your cursor in the square where the first column and the first row meet. Then left click and drag to the bottom right, highlighting all those rows and columns as you do. Decide how many rows you need for that person. Let go of the left click and the boxes should stay highlighted
Then, look on the row of icons above your spread sheet. Do you see one that looks like four window panes? Click on that, and then look for the same icon of four window panes again. Click on it. That will give you borders on each of your boxes. Your first person is finished.
Leave a row or two between your first person and the second one.
Repeat steps 8-13 for your next person.
Keep repeating that until you get all of the people you buy for on your list.
Next, share your newly created spreadsheet with everyone mentioned. Do this by clicking on the big "SHARE" button on the upper right corner of Google Sheets. A new box will pop up where you can start typing email addresses for those you want to be able to access the spreadsheet. If no emails pop up, a second option is to scroll down in that dialog box and click on "Copy Link". Then, you can message everyone you want, explain to them that you're sending a link to a Christmas Shopping Gift Spreadsheet and click "paste". When they click it, they'll be taken directly to the spreadsheet you just created. Once there, they can fill out the things they're asking for, for Christmas They can also view what other people are asking for so they can find their gifts easily.
Now, you can confer privately with the people on this list about who's buying what so you don't end up giving the same gift.
Just remember not to write any purchasing information on this spreadsheet like "I purchased this for Kim" because everyone can see it. You may want to create another spreadsheet similar to this one for you alone, and don't share it with anyone, so you can keep track of what you bought for whom. Instructions on that are found here.


Comments